
StopTech Floating Rotor Replacement
by Dave Zeckhausen
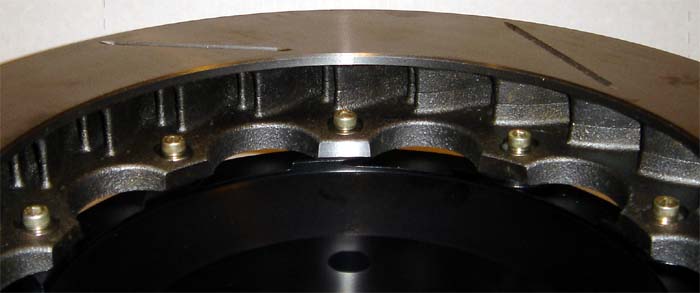
StopTech AeroRotors are attached to lightweight, reusable aluminum AeroHats with float hardware, allowing them to expand radially as they are heated. Thus, they are known as "floating rotors."
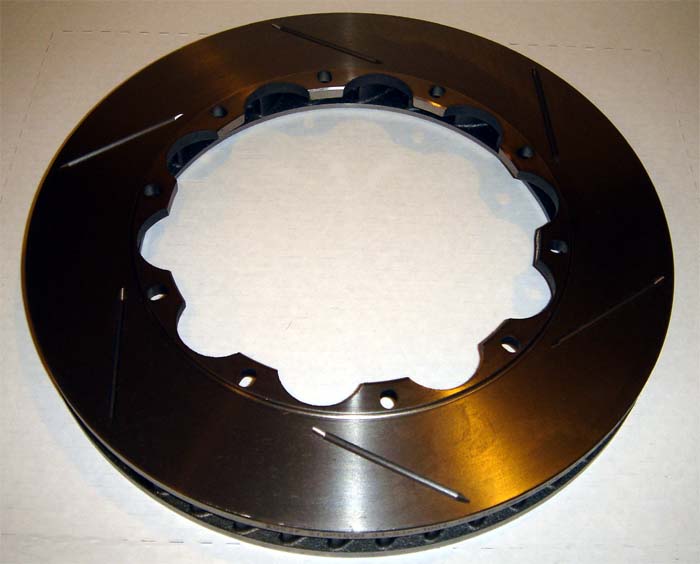
StopTech Rotor (also called "friction ring") attached to aluminum AeroHat
While hat mounting holes are circular, rotor mounting holes are oval, to allow radial expansion as rotors heat up during extreme use.
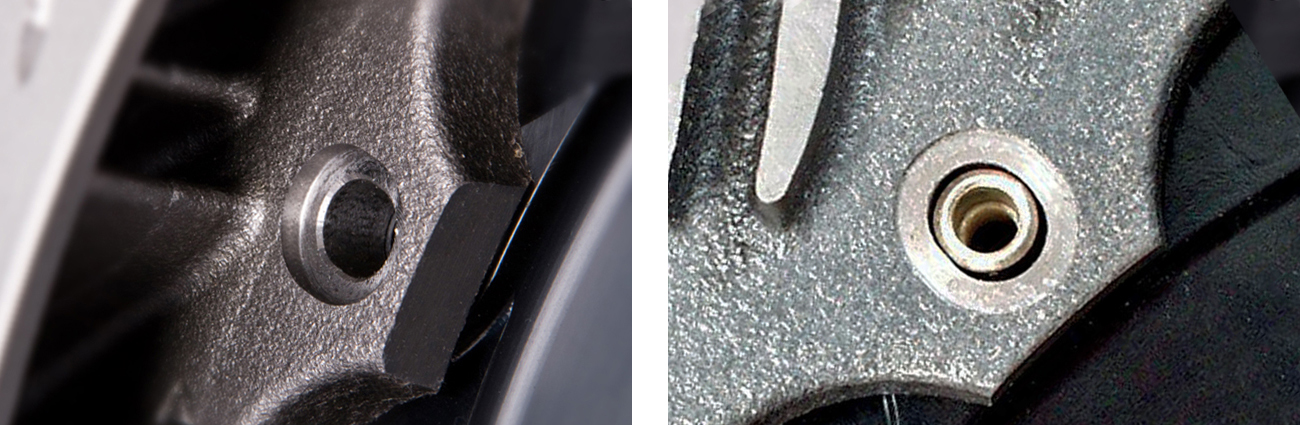
AeroRotor Mounting Holes are Oval
Since iron and aluminum expand at different rates, the oval slots allow the hardware to slide and the rotors to expand and contract, unconstrained by the aluminum hats. This reduces stress at high temperatures, extends component life, and improves pedal feel under heavy racing conditions. Conventional rotors distort into a cone shape during race conditions, leading to tapered pad wear, stress cracks, and spongy pedal feel.
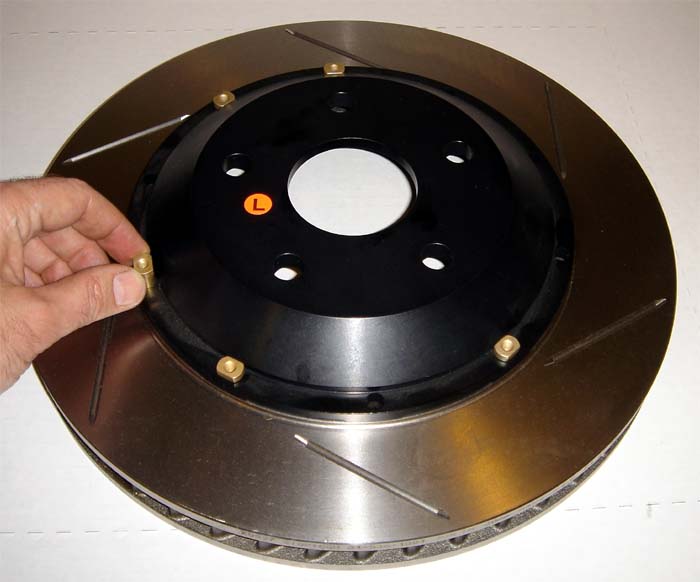
StopTech AeroRotors comes with hat mounting kits, consisting of: Drive pins, M5x0.8mm socket head cap screws (4mm Allen head), and Inconel (Nickel alloy) Belleville washers, acting as anti-rattle springs. Also included is a single use packet of medium-strength, wicking grade threadlocker, and an instruction sheet.

Drive Pin, Spring Washer, and M5x0.8mm Socket Head Cap Screw
Mounting hardware should be replaced at the same time as the rotors. For this reason, StopTech AeroRotors are sold with mounting hardware INCLUDED.
AeroRotor Replacement Instructions
-
Remove rotor and hat assemblies from vehicle.
-
Spray old mounting hardware with penetrating oil and allow to soak.
-
Remove Allen screws from the drive pins with a 4mm Allen T-wrench. To avoid stripping screws, check to be sure Allen wrench is not rounded from excessive use.
Occasionally a bolt may strip while being removed. Carefully applied heat from a torch may be used to soften the thread locking compound. In some cases, it may be necessary to use a vise grip to grab the head of the bolt and break it loose or even to drill out the old hardware. Take reasonable care not to damage the aluminum hat.
-
Remove used drive pins from hat and discard.
Some drive pins may not come out of the hat easily, so it may be necessary to strike them with a hammer. Lay the hat on top the open jaws of a steel bench vice, with jaws open just wide enough to support the hat on either side of the drive pin head. Do not place anything between hat and vice as cushioning, as you want to transmit the full force of each blow to the drive pin, to break the corrosion bond. Once a pin has been tapped flush with the hat, install a used 4mm Allen screw into the drive pin a few turns. Gently tap the screw head until the drive pin is pushed completely out of the hat. Remove screw to release the drive pin and discard both.
-
Lay new rotor face down with mounting flanges facing up.
-
Place hat on top of rotor

-
Install new drive pins into hat. They should slide in, but light tapping with a hammer is not uncommon.
-
Flip rotor over and install bolts and washers finger tight. The concave surface faces downward, making the washers appear as small domes.
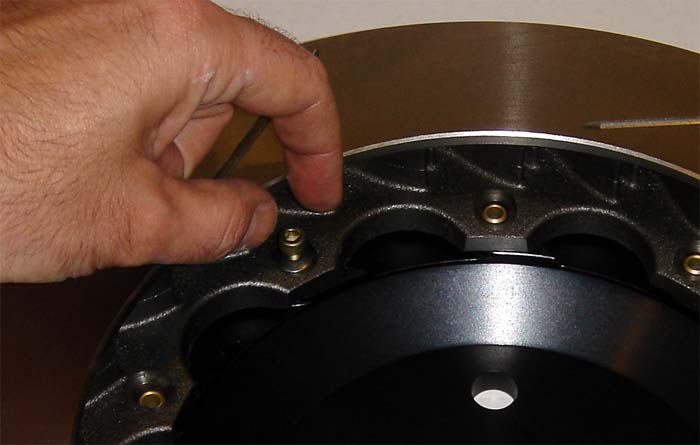
-
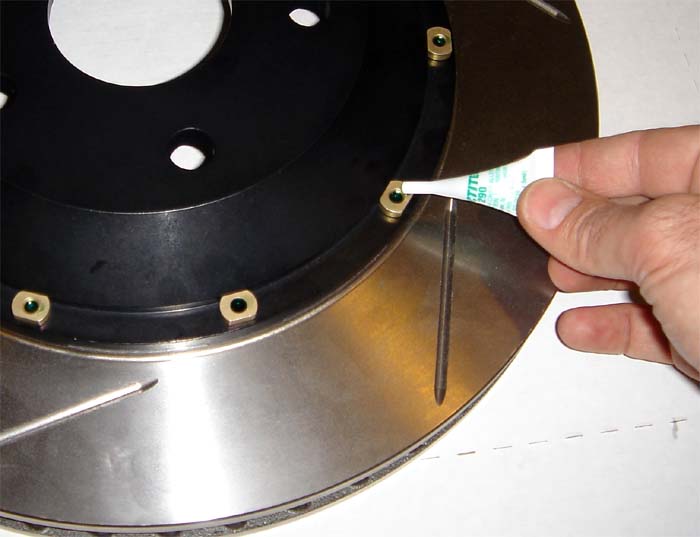
After installing all bolts finger tight, flip the rotor assembly over, hat-side up. Before using the wicking grade threadlocker, shake well, then snip off the end of the plastic nozzle. Place several drops onto the ends of each screw. This special threadlocker is designed to wick into the threads by capillary action, seeking and filling voids in assembled components. Allow assembly to sit for only a few minutes, while it flows into the threads. Then proceed to the next step to torque all fasterners.
-
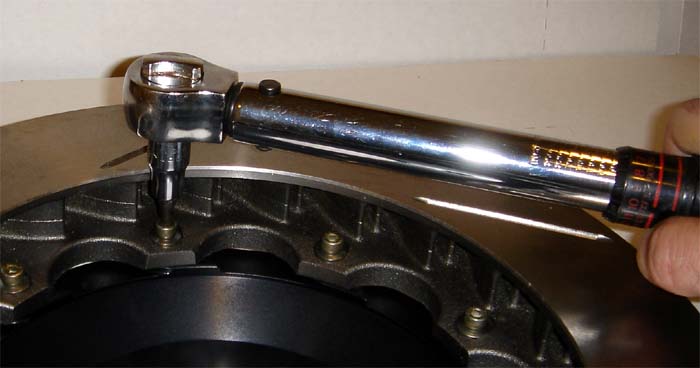
Tighten the screws with a torque wrench to 72 in/lb (6 lb-ft). A torque wrench with the proper range must be used to avoid under or over-tightening the fasteners. This is very important! Do not use a torque wrench that STARTS at 10 lb-ft and goes higher. Torque wrenches are very accurate in the middle of their adjustable range, and very inaccurate at the extremes of their range.
-
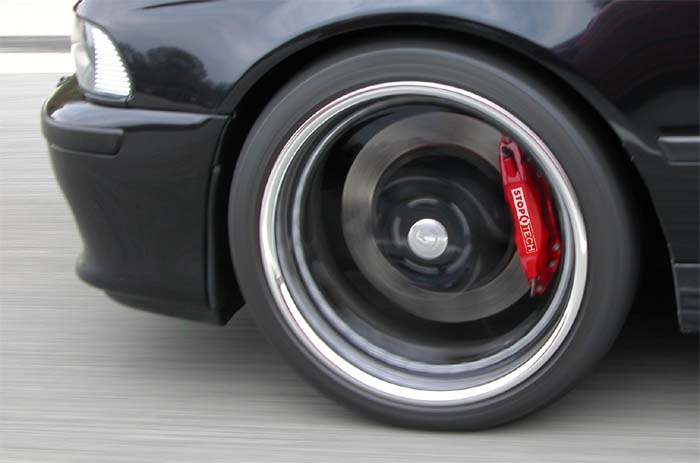
After final tightening of hardware, rotor assemblies can immediately be installed on the vehicle and bedded in.
NEW ROTORS MUST BE BEDDED IN.
The proper break-in procedure is documented here: Bedding in new pads and rotors
If you have questions about rotor installation or any brake related issues, please call Zeckhausen Racing before taking things apart.